Electric bike safety and performance are dependent on the effort put into proper maintenance. However, the torque adjustment is one of the least maintenance tasks, but it’s crucial to the bike’s effective functioning.
Whether you’re adjusting the crank arm or maintaining the handlebars, you need to understand torque. This is because torques determine the bike’s responsiveness, and understanding them sets a pro rider apart. But if you are not a pro rider, you have nothing to worry about.
In this blog post, we break down every little detail about torque settings. Why do they matter, how to check them, and what is the right way to adjust torques? All of these questions will be answered. Are you ready to get started? Let’s go.
What Is Torque and Why Does It Matter on an E-Bike?
Have you seen torque as one of the specifications of an e-bike? And do you wonder what it means? Torque is simply the rotational force a motor produces to assist in the e-bike’s wheels turning. It acts as an intermediary with twisting power that causes your e-bike crank arm to rotate.
For instance, imagine trying to loosen a tight bolt with your bare hands; you know how difficult it gets. Compare that to when you try using a wrench. It gets easier with a wrench, right? That‘s the wrench acting as an intermediary to drive the bolt. The same force you applied when using your bare hands is the same as the force you applied using the wrench, but the outcomes are different. That’s the twisting power.
Furthermore, it is measured in Newton meters(Nm) and also balances tightness and looseness. This balance ensures proper alignment and stability of the bolt.
So why is this torque crucial to riders’ freedom of movement? The performance, safety, and longevity of an e-bike depend on the torque. They ensure that all components are working efficiently without loose bolts. Rider will no longer worry about mechanical failure. Moreover, if you want to reduce the probability of wear and tear on your e-bike, understanding torque is crucial.
Key E-Bike Components That Require Torque Checks
Different components make up an electric bike. Amongst these parts are some critical parts that are easily damaged by simple, constant vibrations. However, regular torque checkups can help prevent this.
- Check your e-bike motor to ensure it is joined to the frame.
- Wobbling and slipping are common to crank arms and pedals. A torque check will prevent this from happening.
- With axle nuts, torque checks are performed to ensure the wheels and frame attachment.
- The disc brake mount is crucial to consistent braking power. This is easily achieved with a torque brake.
- Battery mounting should be done carefully. This will prevent the connector from damage.
- With the torque check, you can confirm the alignment of the handlebars and the stem bolts.
- The saddle must be stable to ensure there are no issues with the seat post clamp, as the rider’s weight varies.
Pro tip: Beginners can do a torque check every 500km. A monthly checkup, depending on your riding style.
Tools You’ll Need to Check and Adjust E-Bike Torque
Having the right tools is crucial for precise and accurate adjustment and checking of e-bike torque. Below are some important tools and what they are used for :
- Allen(hex) keys are used to lock your e-bike hex bolts in place. However, the recommended size is usually 4mm – 6mm.
- The manufacturer’s torque chart is as important as every other tool. It is usually in the manual provided in your e-bike box. For used e-bikes, you will find them on the manufacturer’s website.
- Socket sets are great for large bolts such as those found in crank nuts and motor mounts.
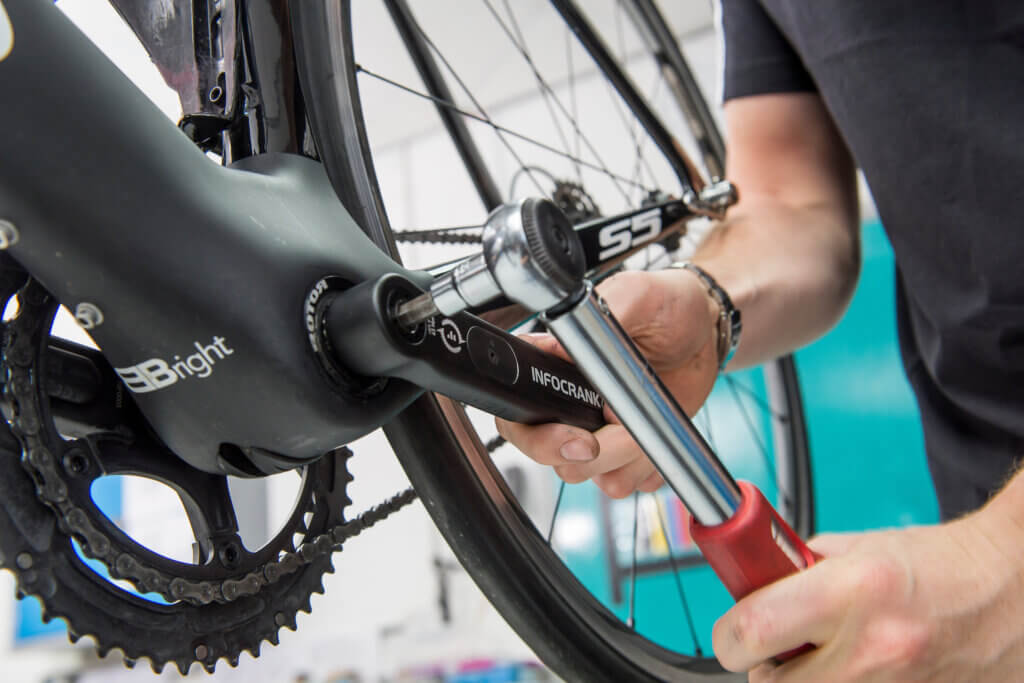
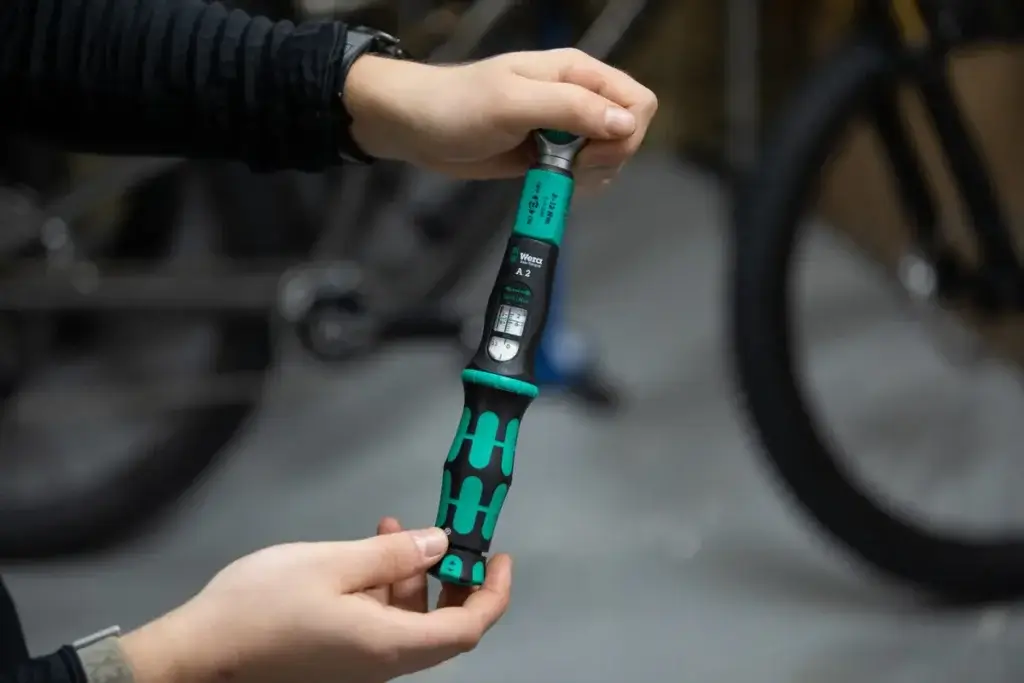
- A torque wrench is the last and most essential tool on this list. They are good for accurate tightening. You can also use the digital torque wrench to get readings in Nm unit. This is the best for easy monitoring.
Pro tip: Do not guess the measurement or ignore the place of accuracy. This might put your safety in question and also crack your carbon and aluminum frame.
How to Check E-Bike Torque Settings (Step-by-Step)
If you are struggling with understanding how to check your e-bike torque settings. Below is an easy step-by-step guide for you:
Step 1: Identify the Components
Get yourself familiar with the bolt that requires checking on your e-bike. However, we highly recommend you focus on the handlebars, crank arms, and the motor mount.
Step 2: Refer to Torque Specifications
Check the manufacturer’s settings to confirm the recommended torque sizes. The most common values are :
- Handlebars bolts: 5-6Nm
- Seatpost clamp: 6-7NM
- Crank bolts: 35-60Nm
- Motor bolts: 15-25Nm
For e-bike brands that don’t specify, you can check the component manufacturer’s website directly. It could be any of these brands: Shimano, Bafang, and Bosch.
Step 3: Inspect for Looseness or Damage
Before the tightening journey begins, pay attention to every bolt for any damage. Whether rust, stress thread, or any crack at the mounting points. If needed, replace the damaged bolts before screwing.
Step 4: Set Your Torque Wrench
Setting the torque wrench to the manufacturer’s recommended setting is a must. For beginners, start by adjusting below the torque target, then increase gradually.
Step 5: Tighten Bolts Evenly
When working on multiple bolt areas, such as the brake mount or stem. Do a cross-pattern when tightening the bolt to ensure an equal pressure.
Step 6: Listen and Feel
When tightening the bolt, you will feel resistance build up. However, when the wrench makes a clicking sound, it’s a sign that your job is done. You need to stop. For digital wrench users, the instant the display shows the torque target. It is done.
Step 7: Check Again After First Ride
You are done with your first ride, but the torque setting isn’t. You need to recheck all bolts and ensure the newly tightened bolts are in good shape.
How to Adjust E-Bike Torque Settings Safely
Some riders think adjusting torques means making it tight. That’s not true; it is more about hitting precision. This is because when bolts are tightened, you might cause a crack. To get precision, below is a list of things to do:

- Before tightening, inculcate the habit of cleaning the bolt with either a clean cloth or grease. Dust affects readings.
- Prevent rounding by not mixing the tools. Use only metric bolts for metric tools.
- Although threadlockers are optional, they remain a good option for bolts that easily give way to vibration, especially motor mounts. Blue threadlockers are highly recommended by bike mechanics. Moreover, the red threadlockers leave a permanent stain.
- Retightening should be done after the bolt has loosened, even if it’s slightly.
Mistakes to Avoid When Checking Torque on E-Bikes
Here is a list of popular mistakes made by even the most experienced cyclists. Pay attention to these mistakes to have a safer experience with your e-bike:
Mistake #1: Ignoring the Manual
Never ignore the e-bike motor torque wrench guide to get your unique torque value. This is always in the manufacturer’s manual. Always check before adjusting.
Mistake #2: Using the Wrong Torque Wrench
Topeak and Park tools are highly recommended brands by experienced riders. Moreover, this brand provides quality wrenches. Avoid buying uncalibrated wrenches to prevent inaccurate readings. We highly recommend a click-style or digital wrenches for riders.
Mistake #3: Over-Tightening Carbon Components
Cracking of carbon components, such as handlebars or seat posts, is a possibility with an over-tightened bolt. Stick to the recommended limit to avoid this situation.
Mistake #4: Forgetting to Recheck
Do not forget to recheck, as the bolt can loosen over time due to constant vibration, especially on a bike with no suspension fork.
Why Proper Torque Settings Improve E-Bike Performance
When torque is correctly adjusted, your e-bike feels smoother, safer, and more efficient. Here’s how it affects performance:
- Torques ensure steady contact between electrical components. Hence, it offers the battery a better range and power delivery.
- Properly connected torques are great for predictable braking, even downhill, where vibration is high.
- With careful checking and adjustment of the e-bike torque settings, handlebars, and seat post, your e-bike parts are protected from wobbling and vibration.
- Motor enjoys stability with no noise.
Final Thoughts: Get the Most Out of Your E-Bike with Proper Torque Care
Although adjusting and checking e-bike torque settings may not be listed in everyday e-bike maintenance tips, it’s paramount to riders’ safety. Whether you are an active or casual rider, your e-bike performance and durability depend on torque settings. This way, you will have a more enjoyable ride.
Are you ready to give your e-bike the care it deserves? If your answer is yes, get your torque wrench and manufacturer’s manual, then do a torque check. Say no to mechanical failure and embrace the world of proper torque for an electric bike.