Do you know that replacing your crank arm isn’t difficult? However, without patience, the right tools, and a guide, you may encounter some hiccups. In this blog post, we have listed the tools required for successful repair. Whether your e-bike crank arm is bent and needs a quick upgrade, you have nothing to fear.
Follow our step-by-step guide to discover an easier and faster way to install and remove your e-bike crank arms. Save some cash on e-bike repair by learning how to fix the e-bike crank arm. Are you ready to discover a quick fix you can do at home? Let’s dive in.
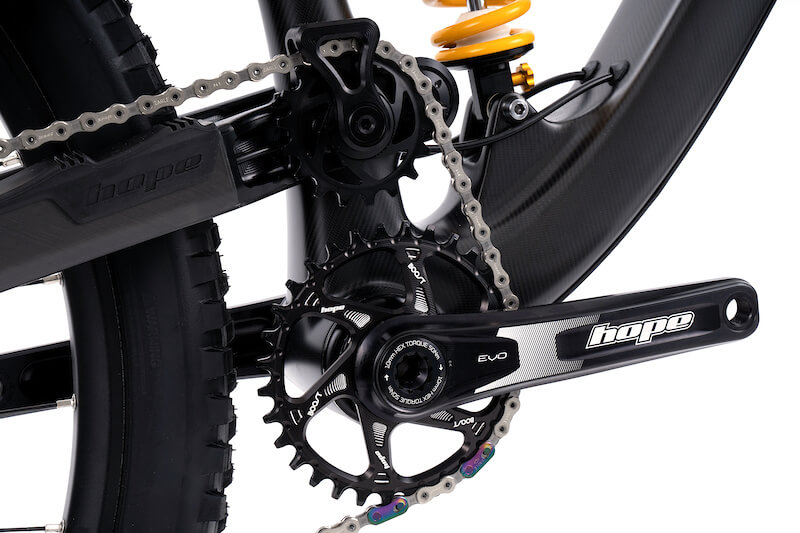
Understanding E-Bike Crank Arms
Many riders have mistaken the crankset for a crank arm. They are not the same. The crank arm is a part of the crankset. Therefore, you must understand what a crank arm is.
The crank arm is the metal lever on your e-bike that connects your pedal to your bottom bracket. Furthermore, the bottom bracket houses your crank axle.

For every time you pedal, the crank arm takes responsibility for converting the leg effort you apply to the chainring to propel your bike forward.
Moreover, the crank arm helps synchronise your pedalling with the e-bike’s motor assist. This is why the crank arm remains an important piece in the rider’s performance.
>>> You might also like to check out DIY Fixes for E-Bike Gear Shifting Problems
Why You Might Need to Replace E-Bike Crank Arms
A crank arm is not a super arm, as heavy use and corrosion can negatively impact it. Below is a list of possible reasons why you might need a quick replacement :
- Lose it fitting on the spindle, therefore causing uneven pedalling or wobbles.
- An accident or crash can cause the arm to be bent or damaged.
- Consider upgrading to a longer or stronger crank arm for better performance.
- Pedal threads might be cross-threaded or striped.
When an e-bike feels unstable or makes so much noise when pedalling, then it’s time to pay attention to the crank arm.
Tools You’ll Need
For a successful crank arm replacement, you need the right tools. Here is a list of tools and what they’re used for:
| Tool | Purpose |
| Allen wrench set (4–8mm) | To remove bolts and pedals |
| Crank puller tool | To safely remove crank arms |
| Bottom bracket tool (if needed) | For cleaning or replacing the crank axle |
| Grease | To protect threads and prevent seizing |
| Torque wrench | To tighten bolts to the manufacturer’s specifications |
| Cleaning rag or brush | To wipe dirt and debris |
| Rubber mallet (optional) | For gentle tapping if parts are stuck |
Pro tip: check to confirm that your tools fit your e-bike crank arm, whether square taper, ISIS, or hollowtech II. This is because the removal method differs based on the types.
Step 1: Prepare Your E-Bike
Keeping your e-bike in a stable position is the best way to proceed before removing any bolts or pedals.
This step includes:
The bike should be placed on a flat surface
Power down your e-bike and remove the battery
Relieve your chain tension by shifting it to the smallest front chainring.
Pro tip: if your e-bike is on the ground, place a towel under it to avoid losing any important part.
Step 2: Remove the Pedals
Starting with the pedal removal makes crank arm removal easier.
- Use your pedal wrench to turn your right pedal counterclockwise to loosen it.
- After removing the right pedals, jump onto the left pedal and remove it using a wrench. Turn the pedal counterclockwise to loosen the pedal.
- Wiggle and remove both pedals in a safe container.
Pro tip: To prevent messing up the left and right bolts. You can label with a paper tape. For tight pedal, apply a few drops of oil for easy removal.
Step 3: Remove the Crank Arm Bolts
Removing the caps and bolts holding the crank arms is the next step in an easy crank arm replacement.
- With an 8mm allen wrench, loosen the centre bolt of your crank arm.
- For an e-bike with the self-extracting feature, your crank arm will come off as you unscrew the bolt.
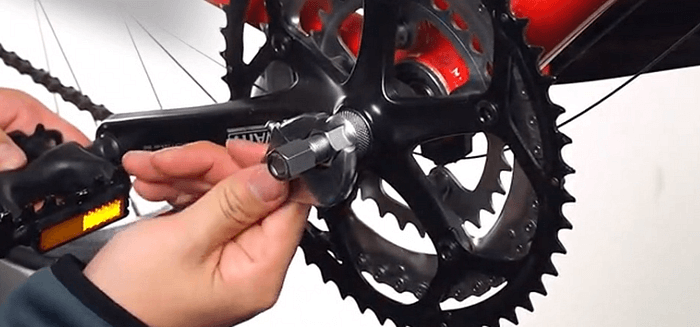
- If your e-bike crank arm does not have this feature, use a crank puller tool.
Tip: Your crank puller needs to be threaded in fully before turning.
Step 4: Use the Crank Puller Tool
It’s time for the removal process:
- Start with crank pullers and screw the outer part into the crank arm.
- Go straight into tightening the tool bolts (inner bolt) by turning it clockwise.
- The crank arm gradually falls out as the inner bolt pushes against the spindle.
- Repeat the same process on the other side of the crank arm.
Pro tip: Avoid using a metal hammer when the crank arm refuses to pull off. Carefully tap with the rubber mallet instead.
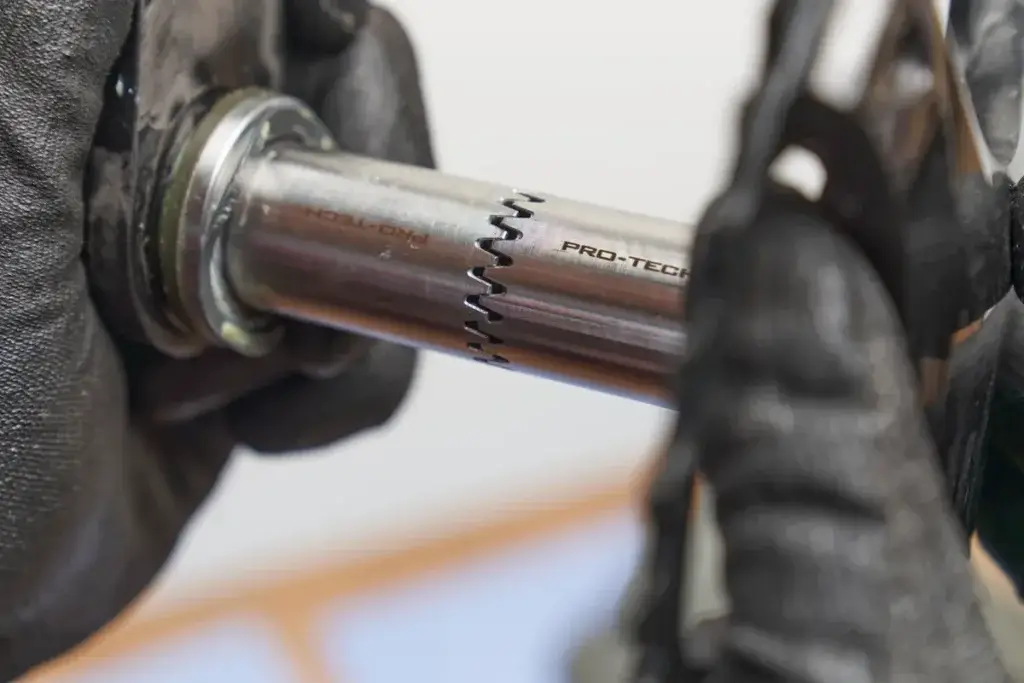
Step 5: Clean and Inspect the Crank Spindle
In e-bike crank arms replacement, inspecting the spindle is crucial. Below is a step-by-step guide to inspect the metal rods in the middle.
- Clean off every grease accumulation, dirt, and metal shavings with a dry cloth.
- Check for rusty and damaged spindles and replace them immediately.
- The spindle splines should be greased. Gently apply fresh grease in a thin layer before reattaching the crank arm.
Pro tip: Greasing remains the better solution for future seizing, making removal easier.
Step 6: Install the New Crank Arms
After you finish cleaning, it is time to move to the installation. For the e-bike crank arm installation, you should follow the steps below:
- Carefully slide the crank arm back into the spindle. The trick to this step is to ensure it’s further aligned with the opposite arm. The two arms should be apart at 180 degrees and facing opposite directions ( one facing up while the other is facing down).
- All crank arm bolts should be properly tightened with an Allen wrench.
- With the manufacturer’s manual and specifications, torque the bolt correctly.
- The same process is used for both sides.
Pro tip: Avoid over-tightening the bolt; it may damage the threads or even the bottom bracket.
Step 7: Reattach the Pedals
- For easy reattachment, add a little grease to the pedal thread.
- Thread your left pedal in a counterclockwise direction and the right pedal in a clockwise direction.
- The bolt should be tightened firmly using the pedal wrench.
Pro tip: Proper greasing will help prevent future seizing and make removal easier.
Step 8: Test for Smooth Operation
After successful replacement, it’s time to determine whether the operation was successful.
- Crank arm spinning should be smooth and free of any wobbling.
- Confirm the movement of the chain by shifting through the gears
- Short test ride to check for any uncomfortable noises.
If there are sounds like clicking or grinding, it is a sign of a loose bolt. Check the bolt for any misalignment. If there is no sound or funny behaviour, then your e-bike crank arm replacement is a success.
Common Mistakes to Avoid
Even pro riders make simple mistakes that eventually lead to a bigger e-bike problem. Below are possible mistakes that can harm your e-bike in the long run.
| Mistake | Why It’s a Problem |
| Forgetting to grease the spindle | Causes the crank arm to seize or creak |
| Misaligning crank arms | Creates an uneven pedal stroke |
| Over-tightening bolts | Can strip threads or crack components |
| Ignoring damaged threads | Leads to poor fitting and possible accidents |
| Mixing up pedal sides | Strips the threads due to reverse threading |
For smoother, longer-lasting repair, avoid all the mistakes listed above.
Troubleshooting After Installation
Here are quick troubleshooting steps if a problem arises after replacing the e-bike crank arm:
- For crank arms that wobble, check the bolt manufacturer’s specifications to confirm if it’s tight enough.
- For the clicking noise, grease the spindle again.
- For pedal thread stripping, replace the damaged arms using a thread repair kit.
Maintenance Tips for Longer Crank Arm Life
Here are a few maintenance tips to keep the replaced crank arms in perfect shape:
- Moisture causes corrosion, so keep clean after every wet ride.
- Crank bolts can loosen after rough rides; therefore, check torques every month.
- Every metal contact should be greased.
- Every month, inspect the pedal threads.
- Heavy pedal strikes on rock should be avoided at all costs.
When to Seek Professional Help
While the crank arm replacement isn’t difficult, there’s a possibility of other underlying issues. These problems may include a cracked motor housing, a damaged spindle, or a bottom bearing bracket. Sometimes the issue might even be an electrical-related malfunction.

If you notice any issues after crank arm replacement, then it is time to see an e-bike mechanic. Even a little problem, such as your motor misreading your pedal assist, should be addressed by a certified technician.
Safety Reminder
Manufacturers’ torque recommendations should be obeyed to the letter. A little torque will cause wobbling, and when it’s too tight, it will destroy your e-bike frame.
Furthermore, riding an e-bike with loose crank arms not only puts you at risk of an accident, but it can also destroy the spindle.
Final Thought
E-bike crank arm replacement may sound intimidating at first thought. But it gets easier and simpler with the right guide and steady hands.
These simple DIYs will save you repair costs and boost your confidence in e-bike maintenance. Replacing crank arms can be done in under an hour.
The next time your e-bike starts wobbling, you can confidently skip that long queue appointment and resolve it in minutes. Let your e-bike and wallet thank you in the coming days.